I made one of these dressy towel-toppers last Christmas just by 'winging it' you could say. No pattern. Just stitch after stitch. A little bit of ripping out. A little bit of head-scratching and I had a dressy towel-topper, but still no pattern.
Well, some of you asked if I could possibly do a pattern for this.
Oh, golly. Me & numbers? Me & strategy? Not such a good thing.
But here you go (and any mistakes [there may be many] let me know!)
*+*+*+*+*+*
What you need:
size G hook
worsted weight yarn
kitchen towel ( I bought mine at Target)
sewing thread
sewing needle
button
Each round ends with a slip stitch to close.
Ch 3 at beginning of each round counts as 1st dc
Begin by chaining 28. Slipstitch to close ring.
Rnd. 1--- Ch 1, work 1 sc in each sc around -- 28 sc.
Rnd 2--- Ch 3 (counts as 1st dc) 1 dc in same stitch, 1 dc in next sc
*2 dc in next sc, 1 dc in next sc* repeat * around. -- 42 dc
Rnd 3--- Ch 3, 1 dc in the next 2 dc, ch 3
*1 dc in the next 3 dc, ch 3*
repeat * around -- 14 sets of 3dc. Fasten off.
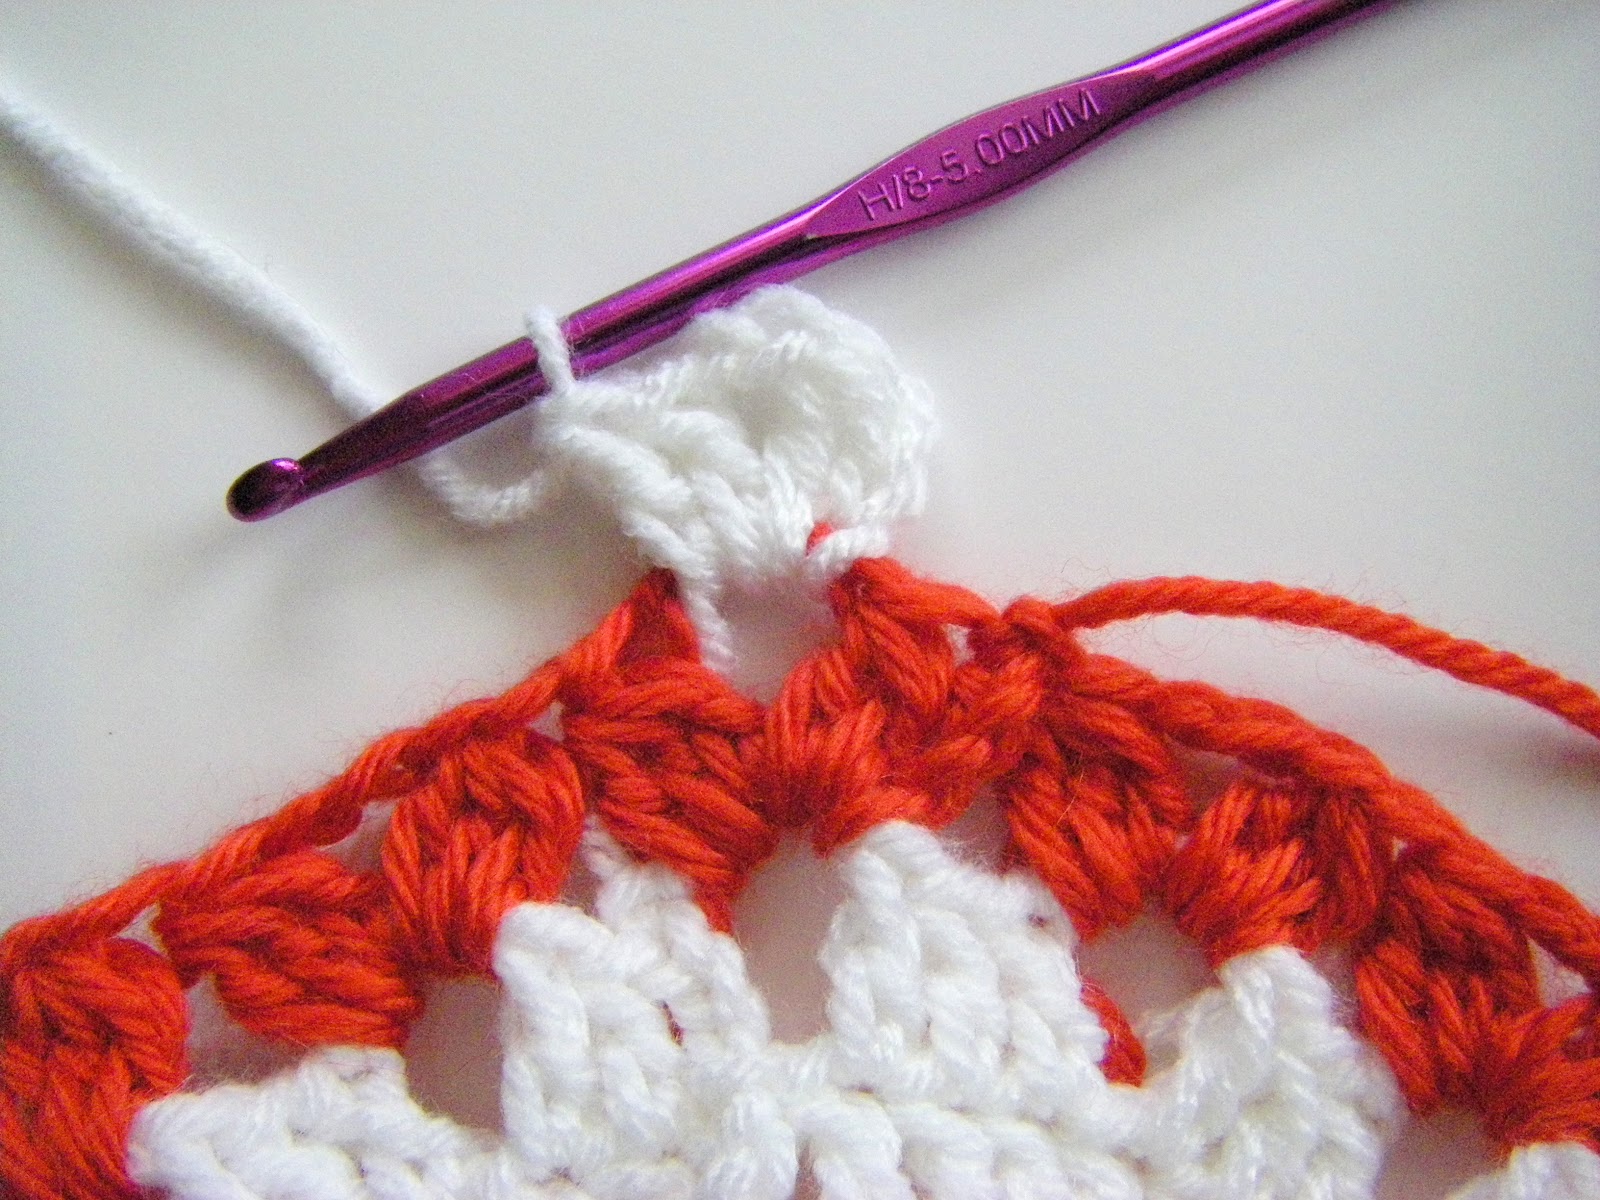
Rnd 4--- Join new color in ch 3 space, Ch 3, dc2tog, ch 3, dc3tog
* dc3tog, ch 3, dc3tog* in each 3 chain space
repeat * around
You will have 14 -- dc3tog, ch 3, dc3tog clusters. Fasten off.
NOTE! This round includes many pics
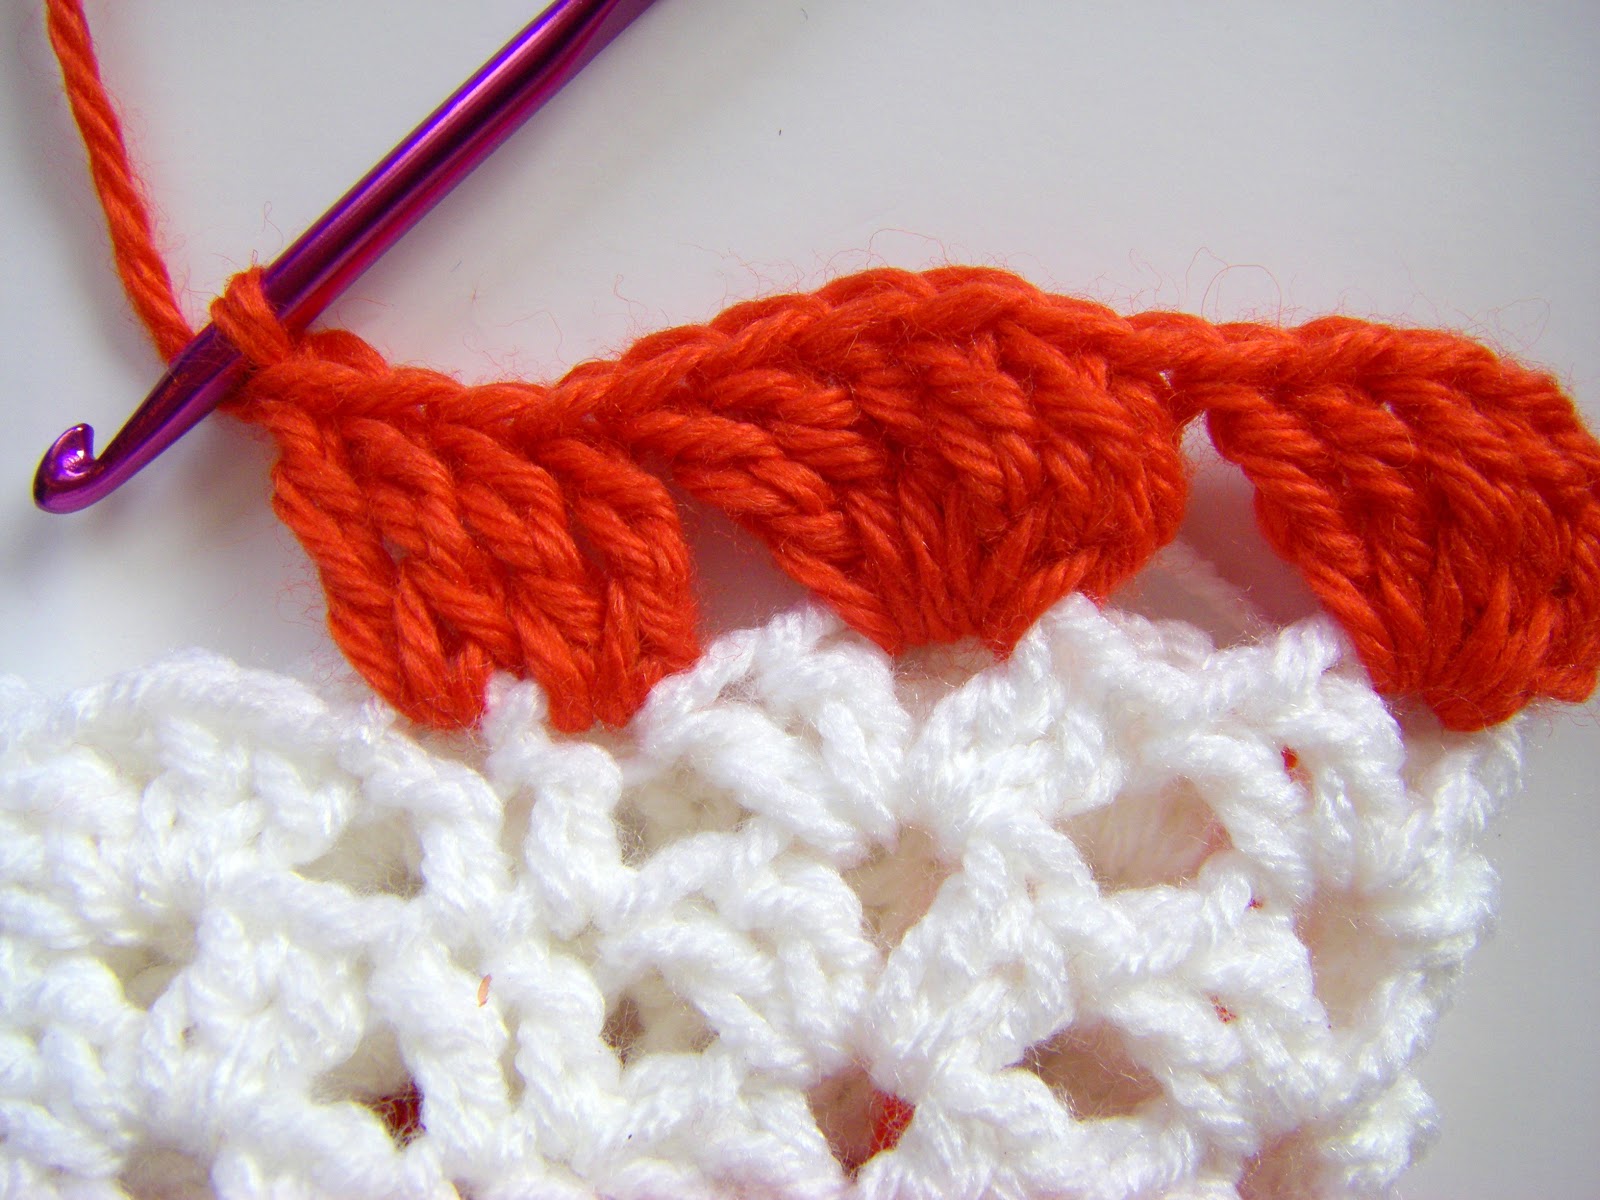
Rnd 5---Join new color in any ch 3 space. Ch 3, 1dc, ch 2, 2dc in ch 3 space
*2dc, ch 2, 2dc in next ch 3 space in the next ch 3 space
1 dc between the 3rd dc and 1st dc of next cluster (see pic)
Now you have to pinch your piece together to form the sleeves of the dress. You will have 4 groups of 2dc, ch 2, 2dc that you will be pinching in your left hand. Yarn over and slip your hook under both layers of 'sleeve'...
...to complete the next dc in that same space as the first dc.*
Sound confusing? It might! -- but if you look at it like it's an actual sleeve that you are trying to form --- it looks easier than what you might think. I hope the next 3 pics can help you see what I am trying to describe.
Rnd 5 continues -- repeat from * 3 more times.
Rnd 6--- Slip stitch to first ch 2 space. Ch 3, 1 dc, ch 2, 2 dc in chain 2 space
*2 dc, ch 2, 2 dc in each ch 2 space, 1 dc in each dc* that forms the underarm of sleeve (see pic)
Repeat from * to end
Rnd 7--- repeat rnd 6
Rnd 8--- Join new color. Ch 4 (counts as 1st tr), 5 tr in ch 2 space
*6 tr in each ch 2 space
2 tr in each dc in underarm of sleeve* Repeat from* to end
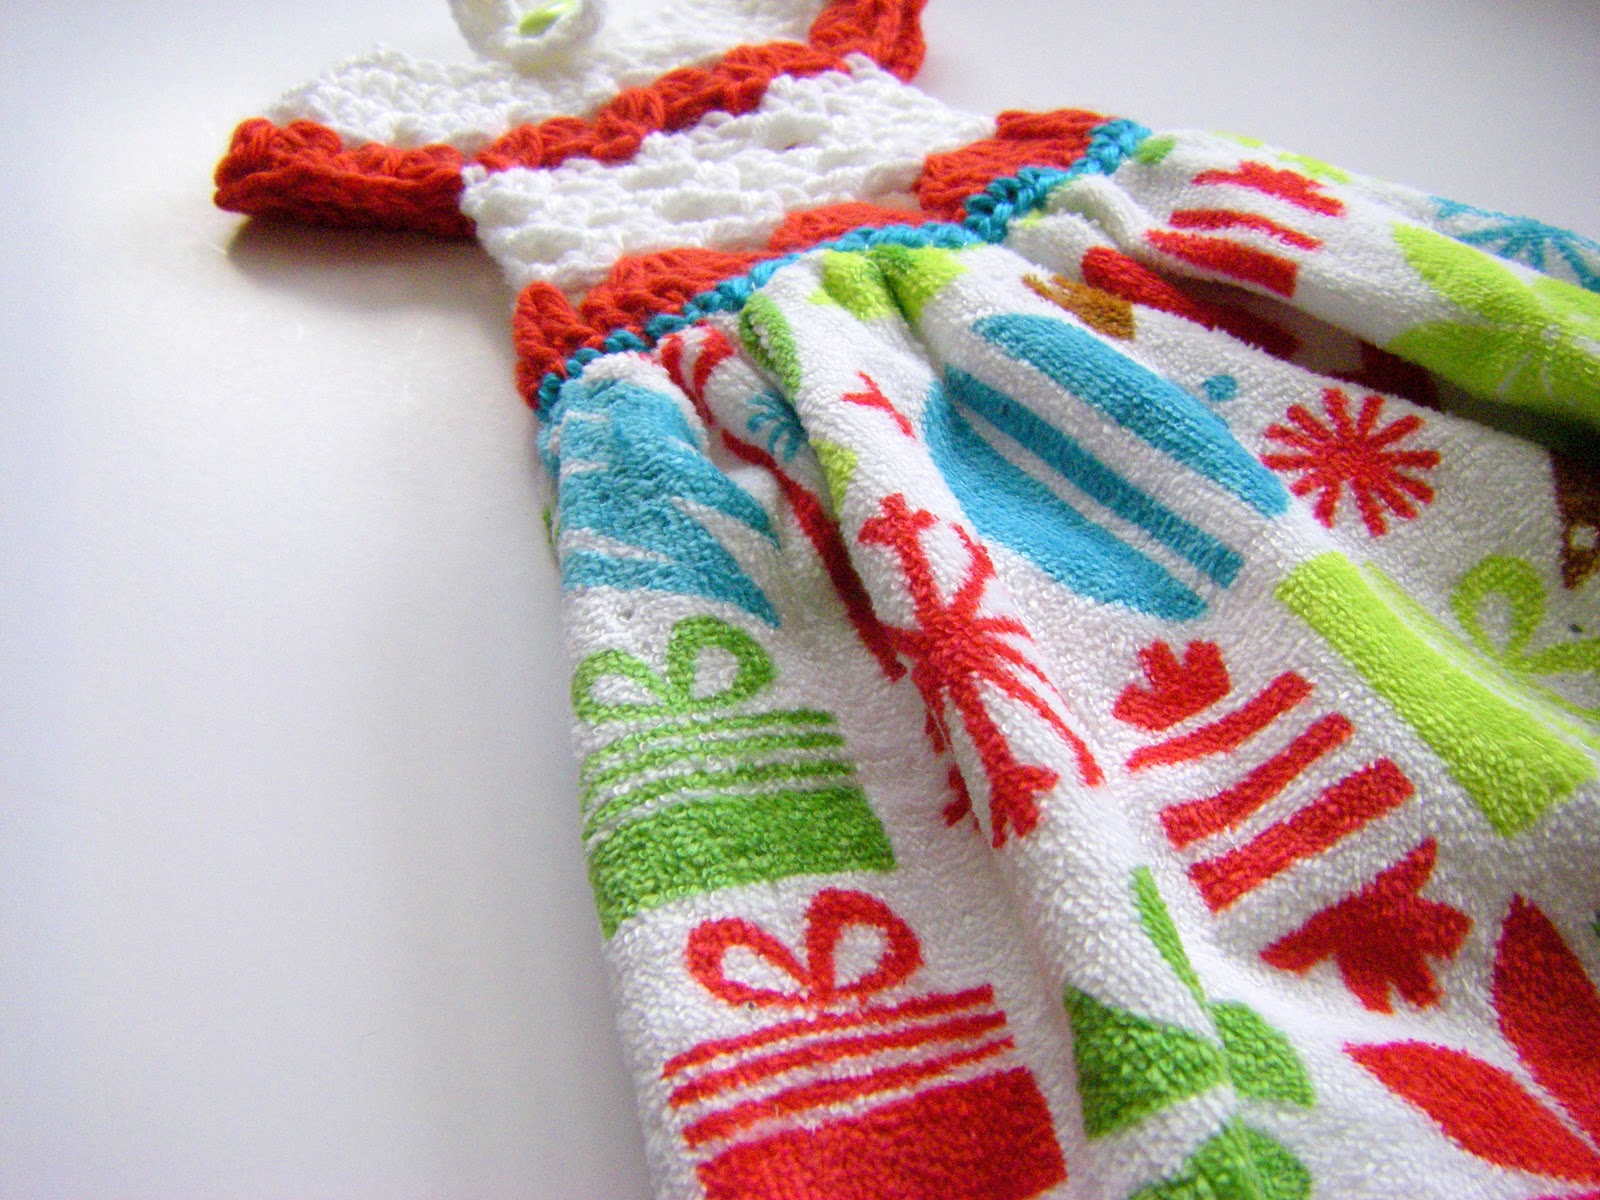
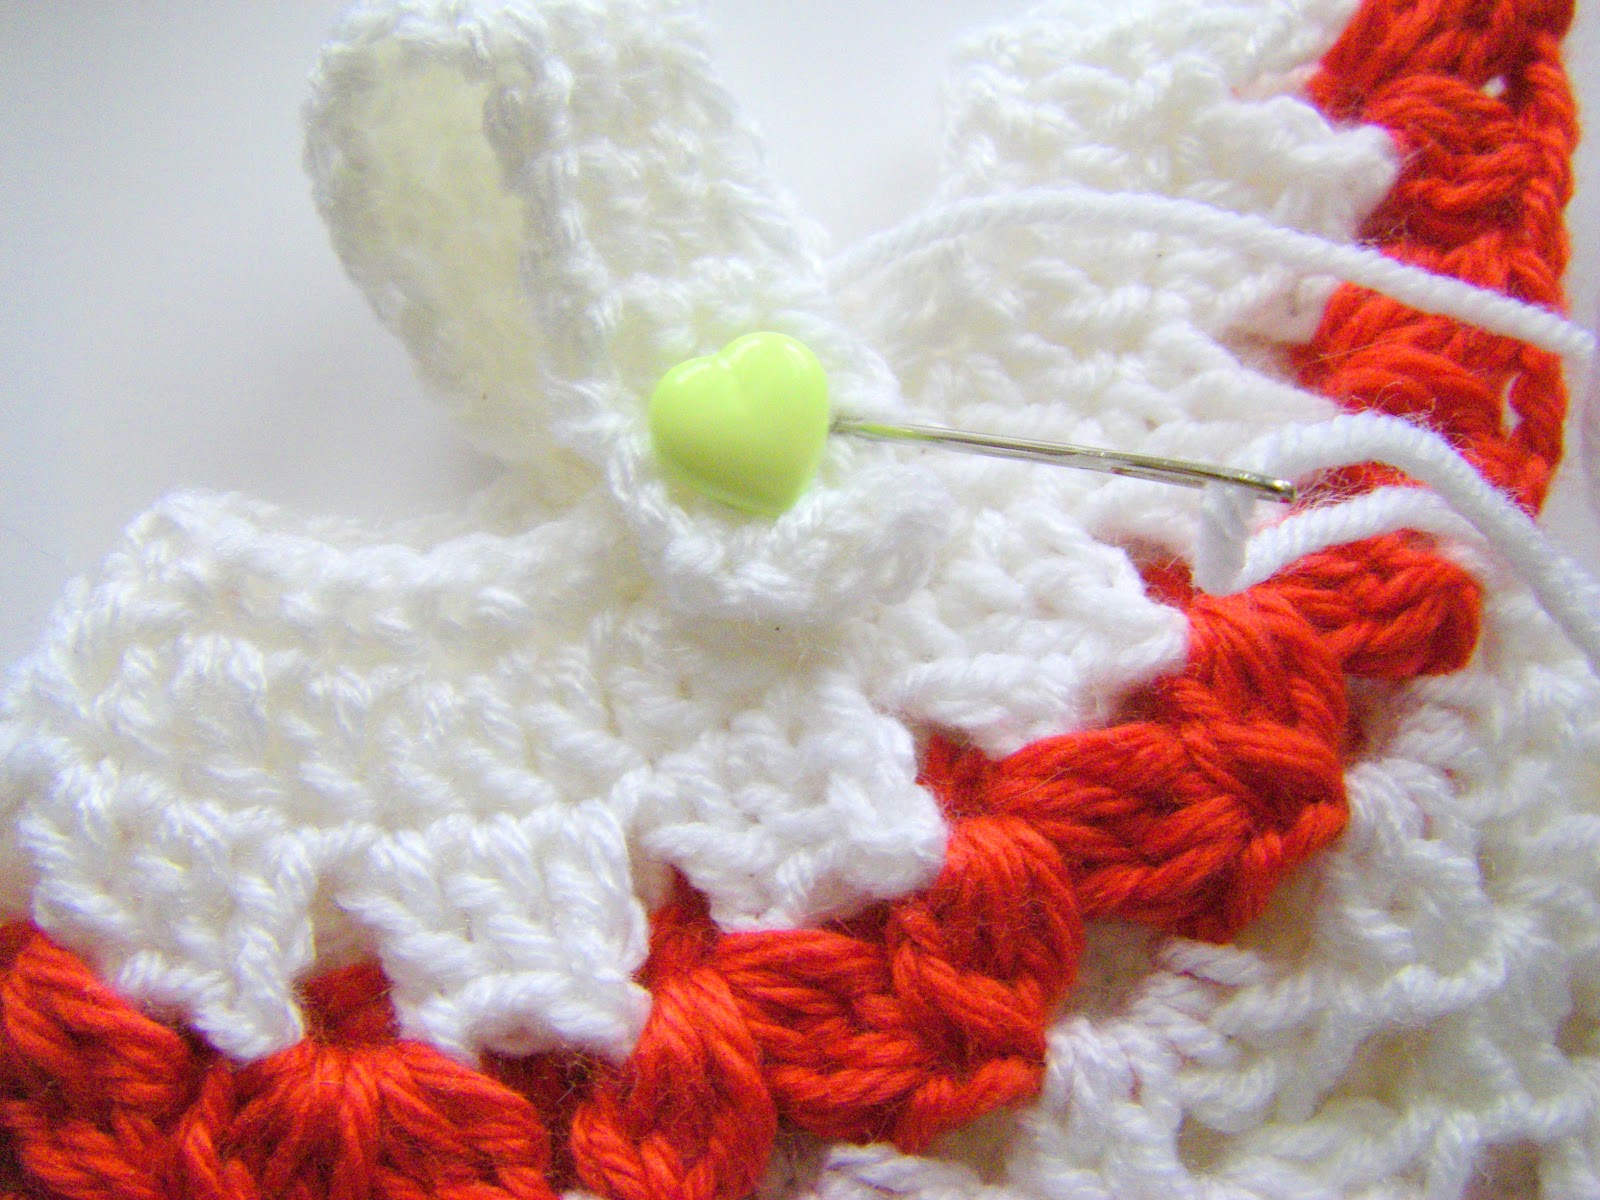
Add a hanger:
On the top edge, I added the hanger by sc into 5 stitches of the collar.
And then just a simple back and forth of sc and ch 1 (turning ch) until you reach the desired length of you hanger.
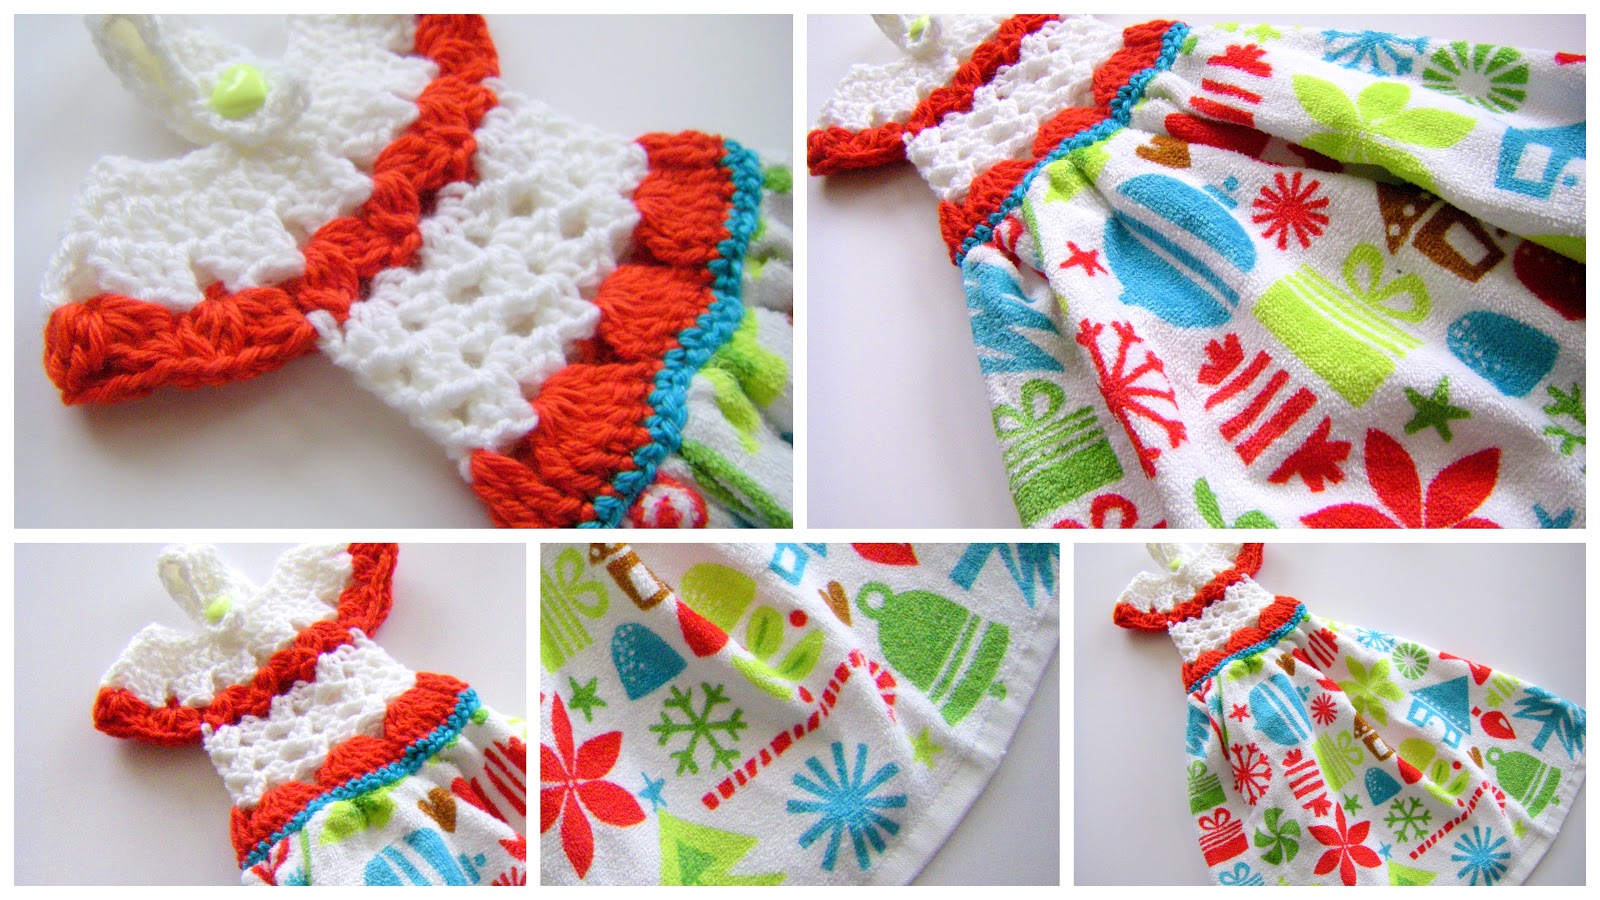
Optional: I added a blue sc border to the bottom edge. You may or may not do this --- it's your choice.
I hand-sewed a button to attach to hanger to the front part of the dress.
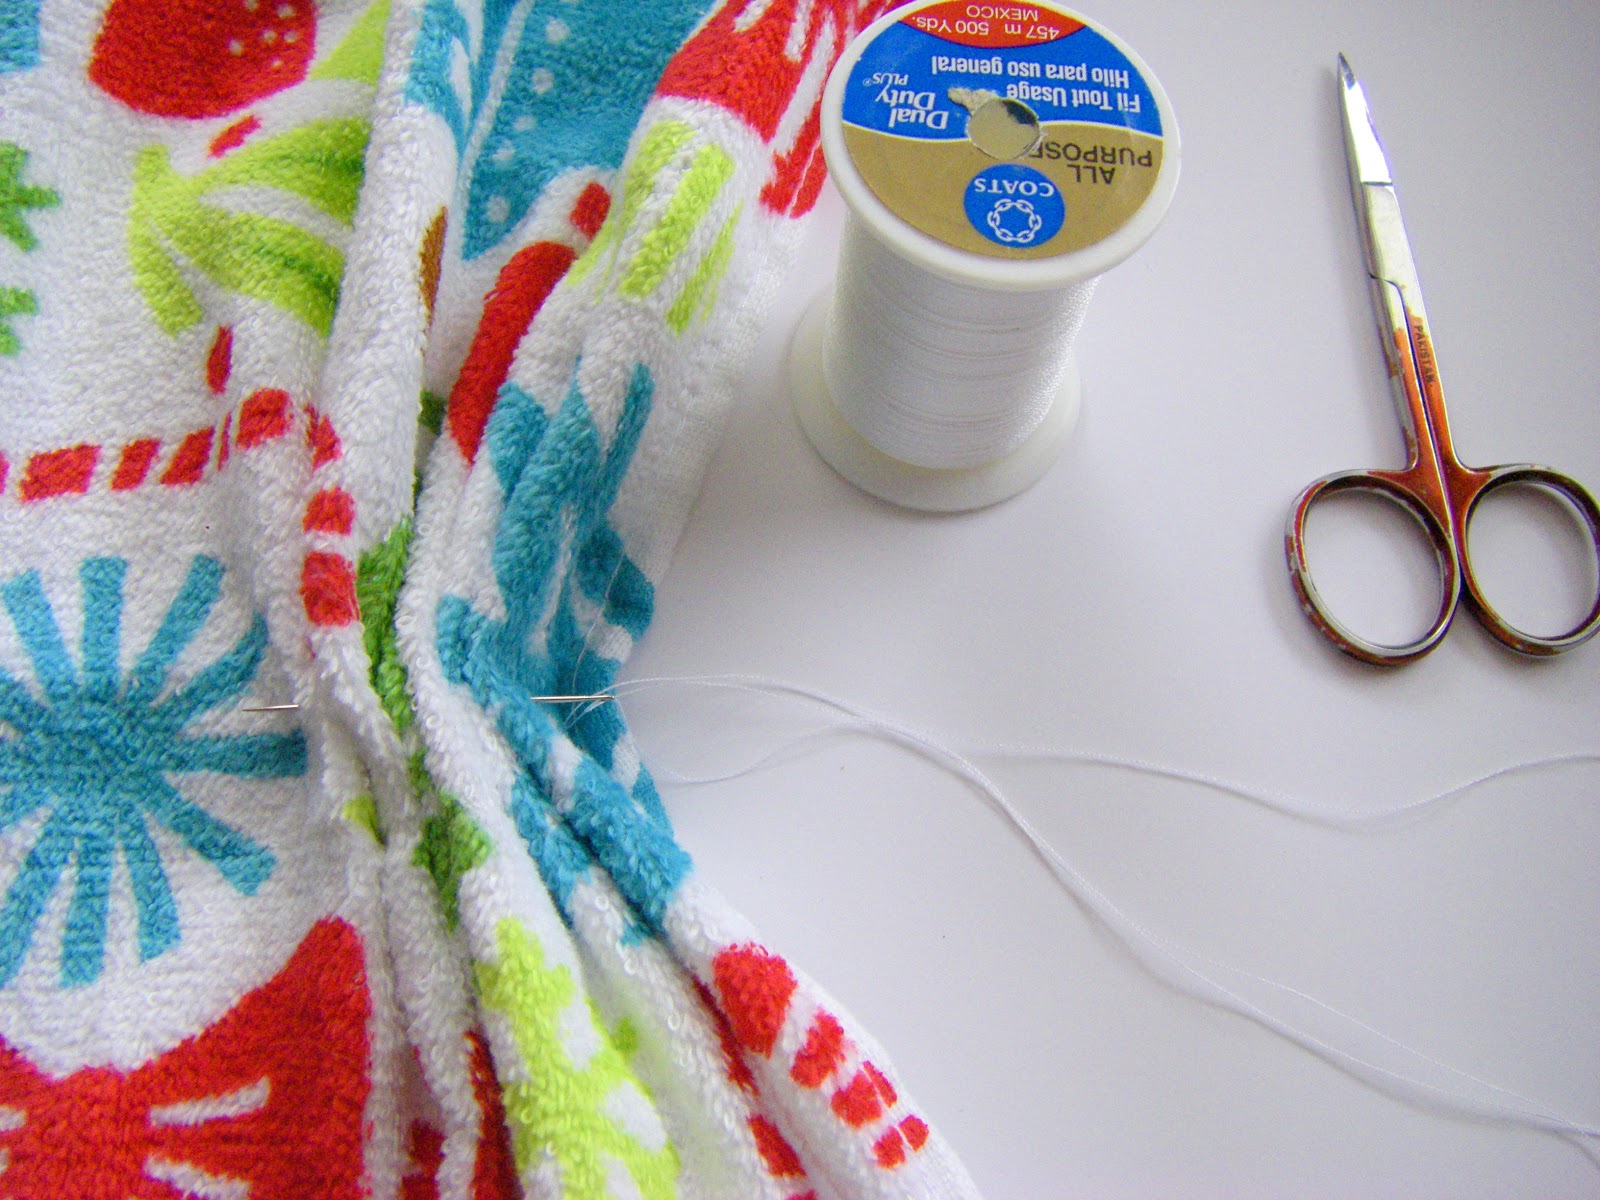
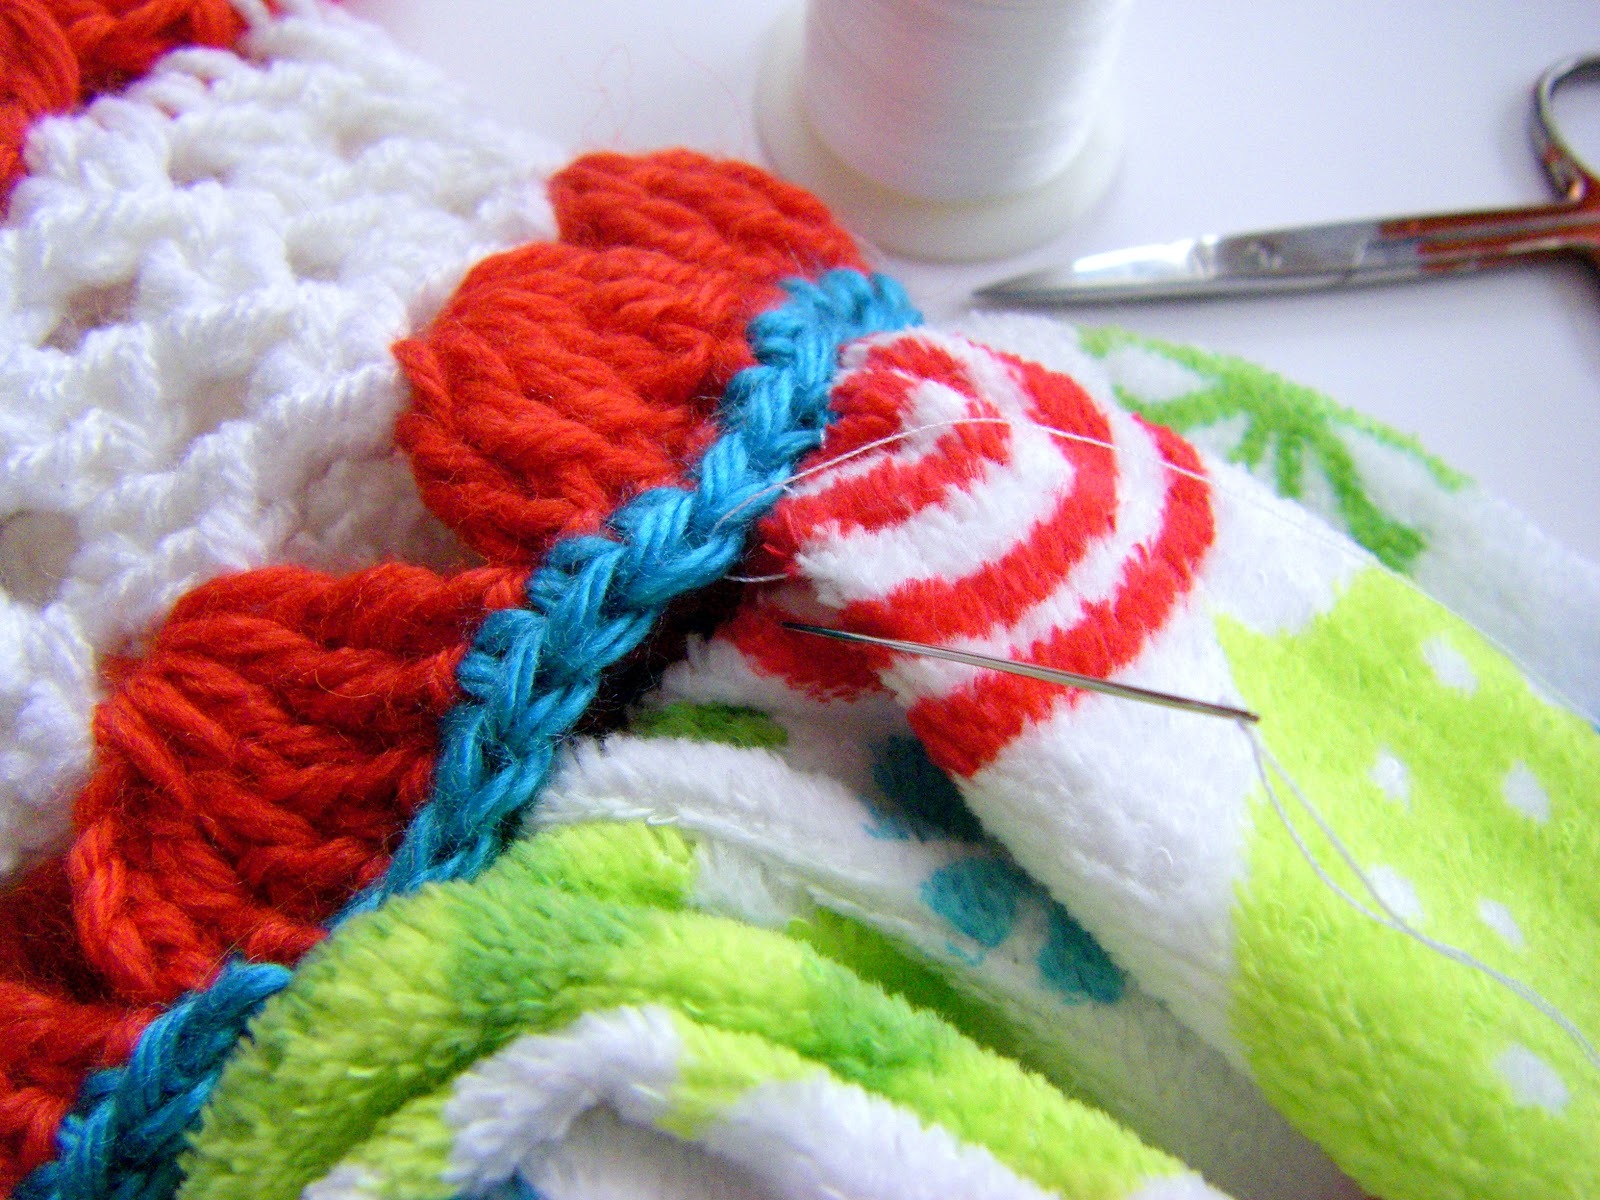
I'm not sure if there is method to attaching this to a towel, but I do know that I don't like it when the towel is cut in half. So I used the entire towel and just hand-sewed a gathering stitch right along the center of the towel to create a rouching effect.
I then folded the towel in half and gathered the towel until it was the width as the bottom edge of the towel-topper...
...and hand-sewed the crocheted top to the towel.
And there you have your dressy towel-topper!